Ready for another great clinical tip to boost your dental practice? Dr. Mike Skramstad is here with a lesson that can boost your digital dentistry game when using CEREC.
For more great tips and ideas on how to level up your clinical knowledge, visit CDOCS to learn more. Additionally, you can learn more about CDOCS' hands-on workshops.
Video transcript
"Hi. This is Mike Skramstad of CDOCS, and in this video, I'm going to show you a very quick way to make models, or more specifically, print models with the Primeprint with your CEREC software.
"So one of the things if you've ever 3D printed models, there's a lot of kind of dancing around you need to do with different softwares. You know, bring it into the specific printer software, add bases, bring it into the mesh mixer -- there's been many things that have had to be done in the past, so I think CEREC is one of the easiest possible ways to make real quick, solid models.
"Now this patient actually needs models for bleaching trays. So my assistant scanned, or the hygienist who was doing the bleaching, scanned just the upper, lower, and buckle bites. And now we're going to just designate this model. So I'm going to go and click Model. We're just going to quickly make a solid model out of the Primeprint model. We're going to make one for the top and the bottom for the bleaching trays. We'll go into the model phase.
"OK, let's just go ahead and make sure this model axis is correct. We'll go ahead and click OK. And then watch what happens when we get into the next part of the software, which will be the design. We'll just simply go ahead and move it. Notice how it automatically is going to draw the lines of where it's going to turn the model. It's going to do this both on the upper and the lower. And what you're going to get immediately from this is a beautifully trimmed hollow model. So that's pretty amazing there. There's the lower. There is the upper. They're both ready to go. We go to the manufacture phase.
"So there we are in the manufacturing phase. We'll go ahead and export to InLab CAM 22. We're going to hit Start. Do you want to do both restorations? Yes, we do. We want to do both the upper and the lower. OK, so they're both going to be exported into the CAM 22 software, and it'll go over there absolutely immediately. So as soon as this is done exporting, we'll go ahead and open up the CAM software.
"Now we're in the CAM 22 software. I generally have it open all day because we're printing so much. We'll go ahead and select the two that we're going to print. And instead of going to the fast-forward, I'm just going to go forward to the arrange stage, because when we're doing just two bleach tray models, I don't need the highest quality. I'd rather optimize the height, make them super flat to print a little bit faster.
"So you can see by default, they are optimized quality. Now, we don't really need to optimize quality when we're doing bleaching trays. You could optimize the footprint, which would allow you to fit many more things. They'd be more vertical, so you could probably fit four to six models on here. But I want to optimize the height, meaning I want you to flatten these out so I can print them as fast as possible. So we'll go ahead and do that.
"OK, so they went ahead and got pretty flat. We'll go ahead and add the production structures on there next. OK, so there's some of these that I really don't need here. I don't need this production, so I can just select that, right-click, delete it. We don't need that one. You know, just some of these. I'll clean up -- kind of keep them off the actual functional surface of these.
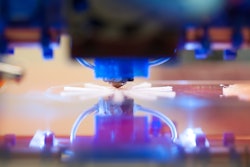
"That looks good. We'll go ahead and go to the production stage. And here all I did is I chose the detail level as low. You know, we're making bleach trays. We don't need a super high detail level. So we went ahead and select Low. And now we'll just go ahead and send to the printer. And we'll go ahead and print these models really quick, as my patient is starting the Zoom.
"So it looks like we're looking at only about 27 minutes to print these two models, so a pretty decent time. And we'll go from there. So hopefully you see that the biggest value with 3D printing these models now is there's direct integration with the CEREC software. Meaning, all I have to do is if I image something in the CEREC software, I can go ahead and simply say I want models. It automatically trims it. It automatically makes a base. It automatically hollows it out. Everything is automatic. You send it directly to CAM and then directly to the printer.
"Now in this particular case, I printed in low quality, optimized the height just to get them to go a little faster because again they are bleaching trays. So hopefully that helps. If you have any questions, please let us know."


