This week, Dr. Doug Smail returns with another clinical tip that can help every dentist and dental practice, courtesy of CDOCS.
Check out the video below from Dr. Smail. You can also visit CDOCS to learn more, and learn more about CDOCS' hands-on workshops.
Video transcript
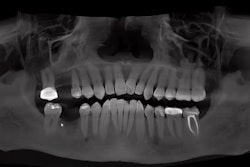
"Now, this patient was referred for removal of fractured teeth #4 and #5 with grafting. Once the patient had healed, we brought the patient back. We got the CEREC scans and we got the cone beam. So let's see how we plan a ghost implant. So the first thing that you do here is you align the crosshairs up right over tooth #3, where the implant had been placed about 10 years ago. And really once that's all set, the next thing that you're going to do is go ahead and set up and place the ghost implant.
"Now why is it a ghost implant? Because I'm putting it directly and perfectly over #3 because I'm going to use this ghost implant on #3 to parallel the implant for #5 so we can have a screw-retained bridge. So once you've got that ghost implant placed, you go ahead and bring the SSI file in like we normally do to bring in the crown proposal for tooth #5.
"Once that's in, you go ahead and you select Implant for #5, and make sure to click Parallel to #3 so it'll make that parallel for the bridge. And once you've done that, you go ahead and bring that virtual implant in for #3, parallel #3 for #5. So once that's done, you go ahead and choose your sleeve and make sure your spacing is correct to do the 360° turn. And then we go ahead.
"Don't forget, you've got to remove the ghost implant of #3 before you send it out. You then pick a guide. In this case, we use a digital guide and send it out."


