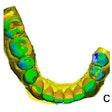
Digital 3D scanners are revolutionary tools for measuring changes in orthodontics, periodontics, and tooth wear. While most studies focus on the accuracy of the 3D scanning process, obtaining the proper alignment from the datasets is still a process prone to error.
Researchers compared three different types of scan alignment and reported that the technique known as reference alignment produced a lower number of errors and more accurate measurements. The study was published January 23 in Dental Materials.
"Reference alignment produced significantly lower alignment errors and truer measurements," wrote the authors, led by Saoirse O'Toole of the department of prosthodontics at the King's College London Dental Institute in the U.K.
3 alignments
Since the introduction of 3D digital scanners, three different types of scan alignment generally have been used:
- Landmark-based alignment
- Best-fit alignment
- Reference best-fit alignment
The landmark-based alignment requires the operator to manually select common landmarks or common points on each dataset, which then are aligned by the software. The drawback is that in situations when the initial alignment is poor or a manual error in a landmark occurs, the alignment process will be only partially complete, according to the researchers.
“Reference alignment produced significantly lower alignment errors and truer measurements.”
The best-fit alignment technique uses an algorithm to align multiple scans, with each software using a slightly different algorithm. The software minimizes the distance error between each corresponding data point. The literature reports some erroneous results in tooth wear progression from this technique, the authors noted.
The reference best-fit alignment technique aligns datasets by restricting alignment to operator-identified sections of the dataset that are least likely to have changed. This avoids the error of minimizing the defect of interest to be measured but introduces an operator error.
The researchers noted that this was the first such study to measure the error of each alignment method. They sought to assess the accuracy of each alignment technique.
The researchers created datasets from 10 natural molar teeth with a structured-light model scanner (Rexcan DS2, Europac 3D). The datasets were duplicated and randomly repositioned, and realignment was attempted using the three techniques in Geomagic Control software (3D Systems). The realignment accuracy then was mathematically assessed.
The effect of the realignment on conventional measurement metrics was calculated by analyzing differences between the known defect size and the defect size after realignment.
| Differences between defect size before and after realignment by technique | |||
| Type of alignment | Landmark | Best-fit | Reference |
| Mean translation error | 139 µm | 130 µm | 22 µm |
| Mean angular error | 2.52° | 0.56° | 0.26° |
Using a reference alignment significantly reduced the mean profilometric change, volume change, and percentage of surface change errors (p < 0.001), the group found.
Underestimation
Perfect realignment will be difficult to obtain with digital comparison software, the authors noted. They did not list any study limitations.
The researchers also concluded that while challenges remain in the process of identifying reference surfaces, two of the three alignment algorithms underestimated the defect size.
"The technique using reference best-fit alignment significantly improved the alignment accuracy and decreased the measurement error," they concluded. "In contrast, landmark-based alignment and standard best-fit alignment resulted in statistically significant increased alignment errors."
