Gary Orentlicher, D.M.D., likes to do implant surgery at home. In his pajamas. While watching a football game. You might think his patients would object to this unusual protocol, but, he says, "they love it."
They love it because Dr. Orentlicher, chief of oral and maxillofacial surgery at White Plains Hospital Center in New York, isn't operating directly on their mouths. Instead, he is planning their surgery in minute detail, via software that allows him to operate virtually on three-dimensional images of their mouths. That precision minimizes patient stress, pain, and swelling when it comes time to the real-life surgery, he says.
"We're taking implant surgery out of the Stone Age," he says. "All of us -- all of us -- have to get on the train, because it really is moving."
And he's not the only one who is convinced. "It's definitely the future," says Michael P. Rethman, D.D.S., M.S., past president of the American Academy of Periodontology and an adjunct faculty member at the University of Maryland.
The technique uses three-dimensional modeling to create surgical guides showing exactly where to put each implant. Dr. Orentlicher, who has a private practice in Scarsdale, N.Y., doesn't recommend the CAD process for all cases but he believes it can help tremendously with complex circumstances.
As evidence, he cites a 2003 study from the International Journal of Oral & Maxillofacial Implants that compared the accuracy of two sets of holes drilled in an artificial jaw. One set was made with a computer-generated guide, the other with a conventional guide. Using the computer-generated guide, surgeons got their implants about one millimeter closer to the target spot than they could with the conventional guide.
|
|
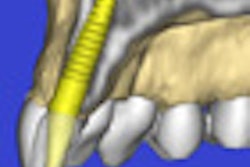
| Computer-guided implant placement software. Video courtesy of EasyGuide and Gary Orentlicher, D.M.D. |
| Having trouble viewing this clip? Click here to download the free Flash player. |
Because of the precision of computer-generated guides, many procedures can be done more quickly and without cutting a flap, avoiding the most painful part of implant surgery. "You'll be amazed at the [speed of] patient's recovery," says Dr. Orentlicher.
And as a side benefit, digital records save space. "I no longer have a closet full of CT scans," he says.
While the technology is sophisticated, it doesn't take a Bill Gates to understand it, Dr. Orentlicher told an audience at the recent Yankee Dental Congress 33 held in Boston. "I learned everything I know on the computer from my kids. You just have to be willing to put in the time."
When should you use it?
"You can make an argument to use this in every case," says Dr. Orentlicher. "I think that's overkill. Anyone with a basic knowledge of anatomy can place an implant between two teeth. But as the edentulous space lengthens, there are fewer references."
Dr. Orentlicher uses computer-guides in the following circumstances:
- Unusual anatomy of the inferior alveolar nerve, incisive canal, or maxillary sinuses; and lingual, buccal, or palatal concavities
- Unusual mandibular canal heights, depths, or widths
- Questionable ridge widths
- An implant position critical to the planned restoration
- Problems related to adjacent teeth
- Three or more implants placed in sequence
- Significant alterations planned to the bony anatomy
- Patients who have received radiation to the head and neck
All told, Dr. Orentlicher uses computer guidance for more than half the implants he places.
Begin with a scan
The process starts in decidedly analog fashion -- you have your lab make a diagnostic wax-up that shows the ideal positions of the planned teeth. From the wax-up, the lab makes a prosthesis which the patient wears while being scanned, either by computed tomography (CT) scan or by cone-beam.
There are two types of prosthesis. For the Nobel Biocare system, the lab makes an acrylic prosthesis with gutta-percha markers as reference points. All of Nobel's competitors use barium as reference points in their prostheses, says Dr. Orentlicher.
In the Nobel system, you scan the patient wearing the prosthesis, and then scan the prosthesis by itself. The software allows you to merge these two images. In the other systems, you need only one scan while the patient wears the prosthesis.
If you're using a CT scanner, the patient lies on a gurney and is slid into the donut-shaped scanner. Inside the donut, an X-ray source spins around the patient producing a “slice” with each revolution. The process takes about a second-and-a-half. The result is a series of images showing the inside of the jaw, like slices in a loaf of bread. Each slice can be turned and inspected on the computer.
By contrast, Cone-beam Volumetric Tomography (CBVT) uses a single cone-shaped beam of radiation that rotates the patient's head only once. The software analyzes the data and constructs three-dimensional images.
Cone-beam scanning subjects the patient to less radiation (five to 10 times less, according to Dr. Orentlicher). That's better for patients - especially children -- and you can do it in your office. But it takes about half-a-minute longer, which may be uncomfortable for some patients. It also produces images with a lower resolution, and softer bone appearing washed out, says Dr. Orentlicher. "The cone-beam is definitely a little fuzzier."
Compute your plan
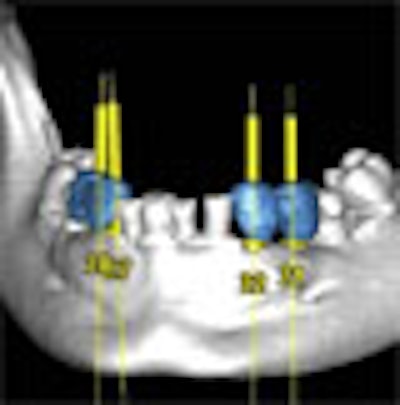
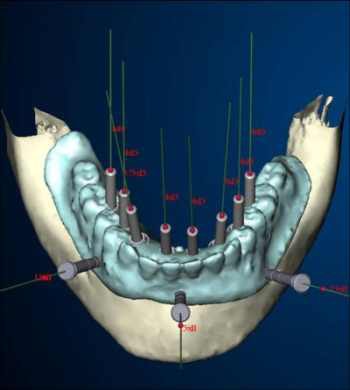
After you feed the images into your software package, you can place abutments and implants virtually on your computer screen. You can clearly see all the features of the patient's anatomy, plan around nerves, measure the distance and angulation of adjacent implants, and calculate the exact size and position of the implants you need.
 |
|
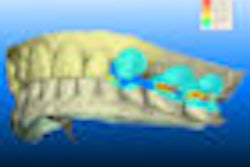
New computer programs like this one from Nobel Biocare allow surgeons to manipulate three-dimensional images, creating guides to place implants. |
As part of your treatment plan, you design a digital surgical drill guide which the software vendor fabricates. Then you place into the patient's mouth this stereolithographic guide. Shaped a little like a night guard, it includes holes showing you exactly where to drill and at what depth. After drilling, you place the implants through the holes. "I know that some of you are shaking your head," Dr. Orentlicher said to the Yankee Dental audience, "but it really does work like this."
Special instruments are available for each system, though some instruments work with more than one system. Some companies provide both the software and the instruments, while others provide only one or the other. Among those that provide both are:
- Procera by Nobel Biocare.
- EasyGuide by Keystone Dental
- VIP Software by Implant Logic Systems
- Implant Master by iDent
- SimPlant by Materialise, which, according to Dr. Orentlicher, owns 70 percent of the market.
The following companies have created instrumentation for use with the SimPlant software:
Dr. Orentlicher has received honorariums for Nobel, Materialise, and Keystone Dental, and is a consultant to Keystone in the development of EasyGuide.
These surgical guides come in three forms: bone-supported, tooth-supported and soft-tissue supported. All three can be finished with any type of restoration.
Bone-supported: SimPlant has patented the only bone-supported guide. Dr. Orentlicher finds it helpful for completely edentulous patients, particularly in cases where you are planning significant bone alteration. "It's also a great appliance if the patient has a severely atrophic ridge and you basically have no landmarks," he says. The bone-supported guide also requires a space of at least 30 millimeters, "which sometimes can be a difficulty." Finally, the bone-supported guide requires a generous incision because it snaps right onto the bone.
Tooth-supported: "I would rather use a tooth-supported guide where there's a frame of reference on the teeth," says Dr. Orentlicher. These guides offer the advantage of allowing flapless surgery. They also allow a mini flap: a small incision that exposes the crest of the bone. "That's a great technique if you want to maintain attached gingiva," says Dr. Orentlicher. "If the patient has thin attached gingiva, you don't want to take a drill and core out the top of the tissue to do flapless surgery." Counterbores and tissue punches are available. Dr. Orentlicher recommends marking the planned incision by using a periodontal probe to puncture the tissue. One disadvantage of the tooth-supported guide: Some companies require a model of the arch in order to fabricate the guide.
Soft-tissue-supported: Used only for edentulous cases. A soft-tissue-supported guide also allows flapless surgery. The surgeon must carefully position this guide using a bite registration. Small screws or pins stabilize the appliance to the jaw, and once in place, it doesn't move until the implants are placed.
Final placement
Once the guide is in place, the surgeon must use instruments designed specifically for both the implant and the surgical guide. "There is a lot of hardware," says Dr. Orentlicher. "Depending on the system, it can be simple or it can be very complicated."
Materialise's Safe System accommodates all standard 4.1 millimeter external hex implants. Nobel Biocare offers drilling instrumentation specifically for its own line of implants. "They're the only company that currently has drilling instrumentation for placing a tapered implant," says Dr. Orentlicher.
Facilitate Planner and Navigator both come with their own instrument trays, while EasyGuide can accommodate Straumann and will soon make instruments available for all five of the biggest implant makers.
Instrument trays typically include the following:
- The surgical guide (stabilized with an anchor pin)
- Drill guides for various diameters of implants and drill widths
- A sleeve of fixed diameter, into which the drill guides all fit
- A bur with a drill stop
- A longer fixture mount to place the implant through the guide
Some manufacturers make a sliding drill stop, others have flat bur stops incorporated into the burs.
Because of the added thickness of the surgical guide, drills must be longer, "which can be an issue from a surgical standpoint," says Dr. Orentlicher. In the Nobel system, for example, the drills must be about 10 millimeters longer than they would be without the guide. After drilling, the surgeon must use a fixture mount to place the implant through the guide.
If all this sounds complicated, it is. "There is no question that in the beginning there is an increased treatment planning time," says Dr. Orentlicher. "And there is definitely an increased expense. From a doctor's standpoint the instrumentation is not cheap. There is also an increased expense for the patients. Between the fabrication of the radiographic [prosthesis] by the laboratory, the CT scan, and the fabrication of the [surgical] guide itself, it usually adds a total somewhere around $1,000 to $1,200 onto the cost of the case."
Still, he's never had a patient tell him not to use computer-guided implant placement because it was too expensive. "It's all in the presentation," he says. "If you explain the positives to them, I have not had one patient say, 'I want to do it the old way, Doc'."
So what'll they think of next?
Dr. Rethman thinks computers will someday directly control machinery that places the implant in the patient's mouth -- something that's already catching on in other branches of medicine. "I don't see any reason why not."
Copyright © 2008 DrBicuspid.com
